JavaFX is a software platform for creating desktop applications. It is intended to replace Swing as the standard GUI library for Java SE. In JavaFX vs. HTML5 article, we can see JavaFX is mainly for Desktop use. In this article, we'll dive deeper into the JavaFX framework and show you how to write a simple JavaFX application in NetBeans.
The following are some key features of JavaFX, which make it a better option for rich and aesthetic UI.
- JavaFX comes with a decent default theme called Modena and many in-built UI controls like Form Controls, TableView, TreeTableView, ListView, Datepicker, WebView, etc.
- This theme and all UI components are easily customizable with CSS.
- You can use FXML, which is an XML based language to create a GUI for your application.
- JavaFX comes with an excellent visual designer called JavaFX Scene Builder, which allows us to design UI without writing any code. The scene builder can be integrated into all the major IDEs like Netbeans, Eclipse, and IntelliJ.
- JavaFX has 3D graphics for creating shapes eg, Cylinder, Box, etc.
- You can create self-contained application packages for all the major operating systems. They resemble native applications for the target operating system. Therefore users get the same launching experience as other native apps. For example, on Windows, you can create .exe or .msi, which are installable on Windows OS.
Creating a simple JavaFX application in NetBeans
Open NetBeans IDE and create a new JavaFX project called JavaFXApplication. This will create a new project and a class called JavaFXApplication.java. If this class is not created, please create it inside the source packages folder.
The content of the file is:
import javafx.application.Application;
import javafx.event.ActionEvent;
import javafx.event.EventHandler;
import javafx.scene.Scene;
import javafx.scene.control.Button;
import javafx.scene.layout.StackPane;
import javafx.stage.Stage;

public class JavaFXApplication extends Application {

    @Override
    public void start(Stage primaryStage) {
        Button btn = new Button();
        btn.setText("Say 'Hello World'");
        btn.setOnAction(new EventHandler() {

            @Override
            public void handle(ActionEvent event) {
                System.out.println("Hello World!");
            }
        });

        StackPane root = new StackPane();
        root.getChildren().add(btn);

        Scene scene = new Scene(root, 300, 250);

        primaryStage.setTitle("Hello World!");
        primaryStage.setScene(scene);
        primaryStage.show();
    }
    /**
     * @param args the command line arguments
     */
    public static void main(String[] args) {
        launch(args);
    }

}
Go ahead and run the program, and the output will be:
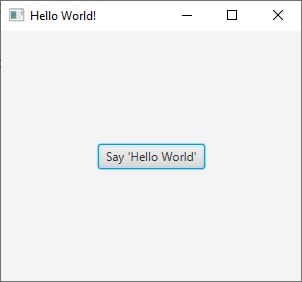
And when you click the button, the application will print Hello World on the console.
run-single:
Hello World!
Code Explanation
Now let us explain the lines of code and also tell you what is happening behind the scenes.
1. Class creation
This is a simple code to create a Java class. Remember, the name of the class should match the name of the file.
public class JavaFXApplication {
}
2. Make it a JavaFX application
To make our application a JavaFX application, we must import JavaFX Application using the following line of code.
import javafx.application.Application;
And then extend the Application. The extend keyword tells our class to inherit from the superclass Application.
public class JavaFXApplication extends Application {
}
3. Implementing start method
The Application class has an abstract method start(Stage stage), which must be implemented in our JavaFXApplication class.
public void start(Stage primaryStage) {
}
The start() method is the main entry or any JavaFX application. Inside this method, we put code to create and display a button.
@Override
public void start(Stage primaryStage) {
    Button btn = new Button();
    btn.setText("Say 'Hello World'");
    btn.setOnAction(new EventHandler() {

        @Override
        public void handle(ActionEvent event) {
            System.out.println("Hello World!");
        }
    });

    StackPane root = new StackPane();
    root.getChildren().add(btn);

    Scene scene = new Scene(root, 300, 250);

    primaryStage.setTitle("Hello World!");
    primaryStage.setScene(scene);
    primaryStage.show();
}
4. Main() Method in JavaFX Application
Note that the main() method is not needed in running a JavaFX application. JavaFX Runtime creates and launches the application itself. The main() method is needed when you package your application in the form of a jar or embed Swing inside your JavaFX Application. It is always good to include the main() method in your app. Inside main() method you call Application.Launch(args), which launches the JavaFX application.
public static void main(String[] args) {
    launch(args);
}
Internals of a simple JavaFX application
The following are important points to put into consideration when building a JavaFX application.
- The main class of any JavaFX application ought to extend JavaFX.application.Application class and implement its start() method.
- The start() method is the main entry point of any JavaFX application.
- The primary stage is created by the platform and is passed as an argument in the start(Stage primaryStage) method. JavaFX Stage is the top-level container of any JavaFX application, and user interface is contained inside a Stage.
- The Scene class contains all user interface content. A Scene has width and height and contains a root node. In our application, the root node is a StackPane, which contains the button.
The lifecycle of a JavaFX application
JavaFX runtime does the following when a JavaFX application is launched.
- It creates an instance of the Application class.
- It calls the init() method of Application class. The init() method does nothing, but it is provided so that programmers can override it to perform any necessary initialization for their apps.
- It calls the start() method. This is the point where user interface of the application is created and made visible.
- Now the application is visible in the foreground. The runtime waits for the application to finish and exit.
- The application exits when Platform.exit() method is called or the last window of the app is closed.
- Before exiting, the stop() method is called. Here the developer has an opportunity to do any cleanup and destroy any resources used by the app.
Conclusion
In this article, we learnt how to create a simple JavaFX application. We also learnt the lifecycle and internals of JavaFX application. We will create more prominent applications with more UI controls like TableView, ListView, etc. and see how we attach handlers with the UI controllers.
You may like:
- Java ArrayList for Absolute Beginners with Examples
- The Best Way to Learn Java Programming Language
- Swap Two Numbers Without a Third Variable in Java
Thank you for reading. Please share it with your friends with links below. See you in the next post.