In this tutorial, I will show you how to upload an image to a PHP server using android retrofit. I will give an explained example and a GitHub repository to download both Android and PHP code.
You will need to upload photos or images from your android app to a server. Many apps have this functionality, including Telegram, Instagram, Facebook, WhatsApp, etc. You have built your excellent app and want users to upload images, for instance, to change profile pictures and send images to other users. If so, this tutorial is just for you. You may use the examples in this tutorial and modify them in your projects.
What is Android Retrofit?
Retrofit is an excellent type-safe HTTP client for Android and Java. Some guys at Square built this awesome library. Retrofit makes it easy to handle JSON or XML data that is parsed into Plain Old Java Objects (POJOs). Retrofit takes care of all HTTP calls and data transmission between Android client applications and a remote server.
So, without any further ado, let's get started by writing one PHP script that will receive images into the Base64String format and save it in a folder.
PHP code to upload base64 image
Open your favorite editor such as Sublime Text 3 and create a new file named uploadimages.php. Note you have to install Xampp or any related software to run PHP scripts locally.
Copy the following code and paste it in.
<?php
$name = $_POST["name"];
$image = $_POST["image"];
$decodedImage = base64_decode("$image");
$return = file_put_contents("images/" . $name . ".jpg", $decodedImage);
$response = array();
if ($return !== false) {
    $response['success'] = 1;
    $response['message'] = "Your image has ploaded successfully with Retrofit";
} else {
    $response['success'] = 0;
    $response['message'] = "Image failed to pload";
}
echo json_encode($response);
Android Retrofit Project
Now create a new project in Android Studio.
1. Go to File ⇒ New Project. When it prompts you to select the default activity, select Empty Activity, and proceed.
2. Open build.gradle in (Module:app) and add Retrofit dependencies like this.
dependencies {
    ….
    implementation 'com.karumi:dexter:5.0.0'
    implementation 'com.squareup.retrofit2:retrofit:2.5.0'
    implementation 'com.squareup.retrofit2:converter-scalars:2.5.0'
}
The first line allows us to use dexter library which simplifies runtime permissions process.
Second line allows us to use the retrofit library and the last one to use the scalar library to convert JSON response into string format
3. Open AndroidManifest.xml and add permissions for INTERNET, READ_EXTERNAL_STORAGE, and WRITE_EXTERNAL_STORAGE like this.
<manifest xmlns:android="http://schemas.android.com/apk/res/android"
    package="com.example.uploadimages">
    <uses-permission android:name="android.permission.INTERNET" />
    <uses-permission android:name="android.permission.READ_EXTERNAL_STORAGE" />
    <uses-permission android:name="android.permission.WRITE_EXTERNAL_STORAGE" />
….
</manifest>
The above permissions are for the internet and reading and writing files on external storage.
4. Next, we will create a handy interface. Create a new java class and call it MyImageInterface.java
Paste the following code in this file.
package com.example.uploadimages;
import retrofit2.Call;
import retrofit2.http.Field;
import retrofit2.http.FormUrlEncoded;
import retrofit2.http.POST;
public interface MyImageInterface {
    String IMAGEURL = "https://learnprogramming.ericmuchenah.com/";
    @FormUrlEncoded
    @POST("uploadimage.php")
    Call<String> getImageData(
            @Field("name") String name,
            @Field("image") String image
    );
}
IMAGEURL variable contains the URL of our web service, i.e., where PHP code is hosted. @POST("uploadimage.php") is the name of the PHP script we created above.
getImageData() method has two parameters. Name of the image and image itself in the Base64 string format.
Now we will write code for activity_main.xml and MainActivity.java
5. Code for activity_main.xml
Open your activity_main.xml file and paste the following lines in it.
<?xml version="1.0" encoding="utf-8"?>
<LinearLayout xmlns:android="http://schemas.android.com/apk/res/android"
    xmlns:tools="http://schemas.android.com/tools"
    android:layout_width="match_parent"
    android:layout_height="match_parent"
    android:layout_margin="10dp"
    android:orientation="vertical"
    tools:context=".MainActivity">
    <ScrollView
        android:layout_width="match_parent"
        android:layout_height="match_parent">
        <LinearLayout
            android:layout_width="match_parent"
            android:layout_height="wrap_content"
            android:layout_marginBottom="20dp"
            android:orientation="vertical">
            <TextView
                android:layout_width="match_parent"
                android:layout_height="wrap_content"
                android:gravity="center"
                android:text="Uploading image to server using Retrofit"
                android:textAllCaps="true"
                android:textColor="#000"
                android:textSize="25sp" />
            <ImageView
                android:id="@+id/imageView"
                android:layout_width="match_parent"
                android:layout_height="400dp"
                android:layout_gravity="center"
                android:layout_marginTop="20dp"
                android:scaleType="fitCenter"
                android:src="@drawable/imageplaceholder" />
            <Button
                android:id="@+id/btnUpload"
                android:layout_width="match_parent"
                android:layout_height="wrap_content"
                android:layout_gravity="center_horizontal"
                android:layout_marginTop="20dp"
                android:background="@color/colorPrimary"
                android:textColor="#FFFFFF"
                android:text="Select Image and upload"
                android:textAppearance="?android:attr/textAppearanceLarge" />
            <ProgressBar
                android:id="@+id/progressBar"
                style="?android:attr/progressBarStyle"
                android:layout_width="wrap_content"
                android:layout_height="wrap_content"
                android:layout_marginVertical="10dp"
                android:layout_gravity="center"
                android:visibility="gone"/>
            <TextView
                android:id="@+id/message"
                android:layout_width="match_parent"
                android:layout_height="wrap_content"
                android:layout_marginTop="15dp"
                android:gravity="center"
                android:text="Sussess!"
                android:textColor="#000"
                android:textSize="20sp" />
        </LinearLayout>
    </ScrollView>
</LinearLayout>
The above code has an ImageView, a Button, a Progressbar, and two TexViews. The progress bar is hidden.
The first text view shows the title “Uploading Image to server using Retrofit”
When the user clicks the button, we want the application to display all the images from the gallery. The user will then select one image, which will be uploaded to the PHP server.
The image view displays the image being uploaded.
The progress bar will be visible once the upload process starts and will be hidden again when the process is completed.
We will get success or error messages and display them on the second text view at the bottom.
6. Code for MainActivity.java
Now open MainActivity.java and paste the following lines of code in it.
package com.example.uploadimages;
import android.Manifest;
import android.content.Intent;
import android.graphics.Bitmap;
import android.graphics.Color;
import android.net.Uri;
import android.provider.MediaStore;
import android.os.Bundle;
import android.util.Base64;
import android.view.View;
import android.widget.Button;
import android.widget.ImageView;
import android.widget.ProgressBar;
import android.widget.TextView;
import android.widget.Toast;
import androidx.appcompat.app.AppCompatActivity;
import com.karumi.dexter.Dexter;
import com.karumi.dexter.MultiplePermissionsReport;
import com.karumi.dexter.PermissionToken;
import com.karumi.dexter.listener.DexterError;
import com.karumi.dexter.listener.PermissionRequest;
import com.karumi.dexter.listener.PermissionRequestErrorListener;
import com.karumi.dexter.listener.multi.MultiplePermissionsListener;
import java.io.ByteArrayOutputStream;
import java.io.IOException;
import java.util.Calendar;
import java.util.List;
import retrofit2.Call;
import retrofit2.Callback;
import retrofit2.Response;
import retrofit2.Retrofit;
import retrofit2.converter.scalars.ScalarsConverterFactory;
public class MainActivity extends AppCompatActivity {
    private Button btn;
    private ImageView iv;
    private TextView tv;
    private ProgressBar progressBar;
    private final int GALLERY = 1;
    @Override
    protected void onCreate(Bundle savedInstanceState) {
        super.onCreate(savedInstanceState);
        setContentView(R.layout.activity_main);
        askForPermissions();
        btn = findViewById(R.id.btnUpload);
        iv = findViewById(R.id.imageView);
        tv = findViewById(R.id.message);
        progressBar = findViewById(R.id.progressBar);
        tv.setText("");
        btn.setOnClickListener(new View.OnClickListener() {
            @Override
            public void onClick(View v) {
                Intent intent = new Intent(Intent.ACTION_PICK,
                        android.provider.MediaStore.Images.Media.EXTERNAL_CONTENT_URI);
                intent.setType("image/*");
                startActivityForResult(Intent.createChooser(intent, "Select Image"), GALLERY);
            }
        });
    }
    @Override
    public void onActivityResult(int requestCode, int resultCode, Intent data) {
        super.onActivityResult(requestCode, resultCode, data);
        if (resultCode == this.RESULT_CANCELED) {
            return;
        }
        if (requestCode == GALLERY) {
            if (data != null) {
                Uri uri = data.getData();
                try {
                    Bitmap bitmap = MediaStore.Images.Media.getBitmap(this.getContentResolver(), uri);
                    iv.setImageBitmap(bitmap);
                    uploadImageUsingRetrofit(bitmap);
                } catch (IOException e) {
                    e.printStackTrace();
                    Toast.makeText(MainActivity.this, "Failed to select image!", Toast.LENGTH_SHORT).show();
                    tv.setText("Failed to select image!");
                    tv.setTextColor(Color.parseColor("#FF0000"));
                }
            }
        }
    }
    private void uploadImageUsingRetrofit(Bitmap bitmap){
        progressBar.setVisibility(View.VISIBLE);
        tv.setText("");
        ByteArrayOutputStream byteArrayOutputStream = new ByteArrayOutputStream();
        bitmap.compress(Bitmap.CompressFormat.JPEG, 100, byteArrayOutputStream);
        String image = Base64.encodeToString(byteArrayOutputStream.toByteArray(), Base64.DEFAULT);
        String name = String.valueOf(Calendar.getInstance().getTimeInMillis());
        Retrofit retrofit = new Retrofit.Builder()
                .baseUrl(MyImageInterface.IMAGEURL)
                .addConverterFactory(ScalarsConverterFactory.create())
                .build();
        MyImageInterface myImageInterface = retrofit.create(MyImageInterface.class);
        Call<String> call = myImageInterface.getImageData(name,image);
        call.enqueue(new Callback<String>() {
            @Override
            public void onResponse(Call<String> call, Response<String> response) {
                progressBar.setVisibility(View.GONE);
                if (response.isSuccessful()) {
                    if (response.body() != null) {
                        Toast.makeText(MainActivity.this, "Image Uploaded Successfully!!", Toast.LENGTH_SHORT).show();
                        tv.setText("Image Uploaded Successfully!!");
                        tv.setTextColor(Color.parseColor("#008000"));
                    } else {
                        tv.setText("No response from the server");
                        tv.setTextColor(Color.parseColor("#FF0000"));
                    }
                }else{
                    tv.setText("Response not successful "+response.toString());
                    tv.setTextColor(Color.parseColor("#FF0000"));
                    Toast.makeText(getApplicationContext(), "Response not successful "+response.toString(), Toast.LENGTH_SHORT).show();
                }
            }
            @Override
            public void onFailure(Call<String> call, Throwable t) {
                progressBar.setVisibility(View.GONE);
                Toast.makeText(getApplicationContext(), "Error occurred!", Toast.LENGTH_SHORT).show();
                tv.setText("Error occurred during upload");
                tv.setTextColor(Color.parseColor("#FF0000"));
            }
        });
    }

    private void askForPermissions(){
        Dexter.withActivity(this)
                .withPermissions(
                        Manifest.permission.WRITE_EXTERNAL_STORAGE,
                        Manifest.permission.READ_EXTERNAL_STORAGE)
                .withListener(new MultiplePermissionsListener() {
                    @Override
                    public void onPermissionsChecked(MultiplePermissionsReport report) {
                        // check if all permissions are granted
                        if (report.areAllPermissionsGranted()) {
                            Toast.makeText(getApplicationContext(), "All permissions are granted by user!", Toast.LENGTH_SHORT).show();
                        }
                        // check for permanent denial of any permission
                        if (report.isAnyPermissionPermanentlyDenied()) {
                        }
                    }
                    @Override
                    public void onPermissionRationaleShouldBeShown(List<PermissionRequest> permissions, PermissionToken token) {
                        token.continuePermissionRequest();
                    }
                }).
                withErrorListener(new PermissionRequestErrorListener() {
                    @Override
                    public void onError(DexterError error) {
                        Toast.makeText(getApplicationContext(), "Some Error! ", Toast.LENGTH_SHORT).show();
                    }
                })
                .onSameThread()
                .check();
    }

}
The above code does all the work of selecting an image from the gallery, previewing it, and uploading it to the PHP server.
7. MainActivity.java code explanation
Now let see what each line in MainActivity.java class does.
1. Requesting permission
we call askForPermissions() method in onCreate() method. This method checks if the user has granted INTERNET, READ_EXTERNAL_STORAGE, and WRITE_EXTERNAL_STORAGE permissions. If they are not granted, then the method prompts the user to allow.
The following is the code for this method
private void askForPermissions(){
        Dexter.withActivity(this)
                .withPermissions(
                        Manifest.permission.WRITE_EXTERNAL_STORAGE,
                        Manifest.permission.READ_EXTERNAL_STORAGE)
                .withListener(new MultiplePermissionsListener() {
                    @Override
                    public void onPermissionsChecked(MultiplePermissionsReport report) {
                        // check if all permissions are granted
                        if (report.areAllPermissionsGranted()) {
                            Toast.makeText(getApplicationContext(), "All permissions are granted by user!", Toast.LENGTH_SHORT).show();
                        }
                        // check for permanent denial of any permission
                        if (report.isAnyPermissionPermanentlyDenied()) {
                        }
                    }
                    @Override
                    public void onPermissionRationaleShouldBeShown(List<PermissionRequest> permissions, PermissionToken token) {
                        token.continuePermissionRequest();
                    }
                }).
                withErrorListener(new PermissionRequestErrorListener() {
                    @Override
                    public void onError(DexterError error) {
                        Toast.makeText(getApplicationContext(), "Some Error! ", Toast.LENGTH_SHORT).show();
                    }
                })
                .onSameThread()
                .check();
    }
2. Button Clicked
We set on click listener on our button using setOnClickListener() method. When the user clicks the button, one intent will be created. The intent if for ACTION_PICK. Therefore, the user will be able to select an image.
We set the intent type to images to prevent the user from selecting other types of files.
The following is the code for button click.
btn.setOnClickListener(new View.OnClickListener() {
            @Override
            public void onClick(View v) {
                Intent intent = new Intent(Intent.ACTION_PICK,
                        android.provider.MediaStore.Images.Media.EXTERNAL_CONTENT_URI);
                intent.setType("image/*");
                startActivityForResult(Intent.createChooser(intent, "Select Image"), GALLERY);
            }
        });
After an image has been selected, onActivityResult() method will be executed.
3. Code for onActivityResult() method
The following are the lines for this method
@Override
    public void onActivityResult(int requestCode, int resultCode, Intent data) {
        super.onActivityResult(requestCode, resultCode, data);
        if (resultCode == this.RESULT_CANCELED) {
            return;
        }
        if (requestCode == GALLERY) {
            if (data != null) {
                Uri uri = data.getData();
                try {
                    Bitmap bitmap = MediaStore.Images.Media.getBitmap(this.getContentResolver(), uri);
                    iv.setImageBitmap(bitmap);
                    uploadImageUsingRetrofit(bitmap);
                } catch (IOException e) {
                    e.printStackTrace();
                    Toast.makeText(MainActivity.this, "Failed to select image!", Toast.LENGTH_SHORT).show();
                    tv.setText("Failed to select image!");
                    tv.setTextColor(Color.parseColor("#FF0000"));
                }
            }
        }
    }
The app will read the URL of the selected image and then it will create a bitmap of the image.
The bitmap will be set on the image view.
Then our method, uploadImageUsingRetrofit(), to upload the image to the PHP server will be called.
4. Code for uploadImageUsingRetrofit()
The following is the code for this method.
private void uploadImageUsingRetrofit(Bitmap bitmap){
        progressBar.setVisibility(View.VISIBLE);
        tv.setText("");
        ByteArrayOutputStream byteArrayOutputStream = new ByteArrayOutputStream();
        bitmap.compress(Bitmap.CompressFormat.JPEG, 100, byteArrayOutputStream);
        String image = Base64.encodeToString(byteArrayOutputStream.toByteArray(), Base64.DEFAULT);
        String name = String.valueOf(Calendar.getInstance().getTimeInMillis());
        Retrofit retrofit = new Retrofit.Builder()
                .baseUrl(MyImageInterface.IMAGEURL)
                .addConverterFactory(ScalarsConverterFactory.create())
                .build();
        MyImageInterface myImageInterface = retrofit.create(MyImageInterface.class);
        Call<String> call = myImageInterface.getImageData(name,image);
        call.enqueue(new Callback<String>() {
            @Override
            public void onResponse(Call<String> call, Response<String> response) {
                progressBar.setVisibility(View.GONE);
                if (response.isSuccessful()) {
                    if (response.body() != null) {
                        Toast.makeText(MainActivity.this, "Image Uploaded Successfully!!", Toast.LENGTH_SHORT).show();
                        tv.setText("Image Uploaded Successfully!!");
                        tv.setTextColor(Color.parseColor("#008000"));
                    } else {
                        tv.setText("No response from the server");
                        tv.setTextColor(Color.parseColor("#FF0000"));
                    }
                }else{
                    tv.setText("Response not successful "+response.toString());
                    tv.setTextColor(Color.parseColor("#FF0000"));
                    Toast.makeText(getApplicationContext(), "Response not successful "+response.toString(), Toast.LENGTH_SHORT).show();
                }
            }
            @Override
            public void onFailure(Call<String> call, Throwable t) {
                progressBar.setVisibility(View.GONE);
                Toast.makeText(getApplicationContext(), "Error occurred!", Toast.LENGTH_SHORT).show();
                tv.setText("Error occurred during upload");
                tv.setTextColor(Color.parseColor("#FF0000"));
            }
        });
    }
We pass the bitmap as an argument of this method. The bitmap will be converted into a Base64 string format.
We get the value of current milliseconds as the name of our uploaded image.
We now use the Retrofit class to upload the image.
First, we specify URL to our web service to Retrofit class using baseURL() method and pass MyImageInterface.IMAGEURL as its parameter.
Then we make an HTTP call to the PHP server using myImageInterface.getImageData() method, where we pass the name of the image and its content as the parameters of this method.
When a response is received from PHP server onResponse() method is called, and inside this method, we shall tell the user whether the image was upload successfully or not.
In case an error is encountered during the HHTP call, the onFailure() method is called. Here we tell the user that an error was encountered.
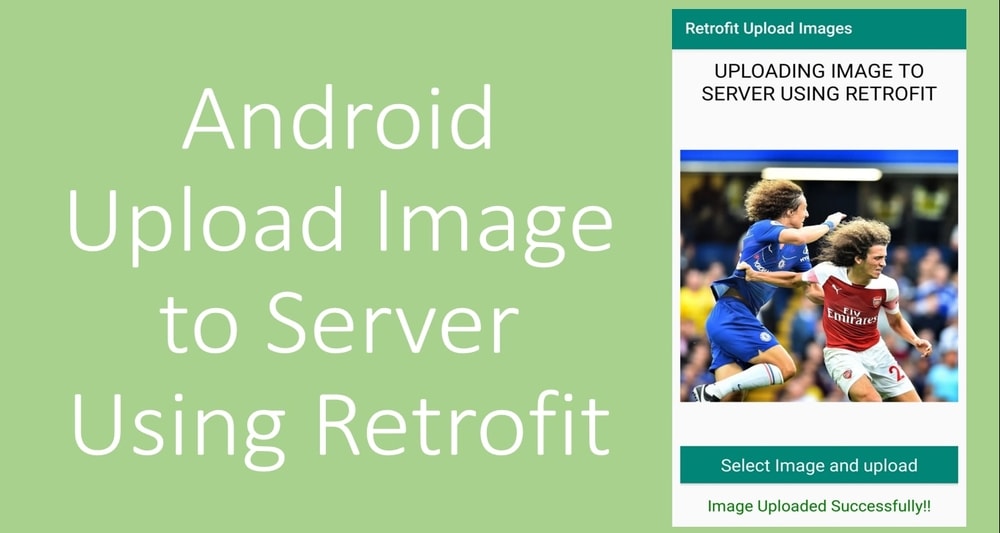
Application Output
When you successfully write and run the application, you will see the following. This is the screenshot of our app with an image successfully uploaded to the remote PHP server.

You can get the complete code for Android Upload Image to Server Using Retrofit from my GitHub repository. You may also make changes to the code and use it in your projects.
You may like:
Conclusion
That is how to upload images to the PHP server from the Android application using Retrofit. Thank you for reading this article. Please vote below and share it with your friends and fellow android developers.